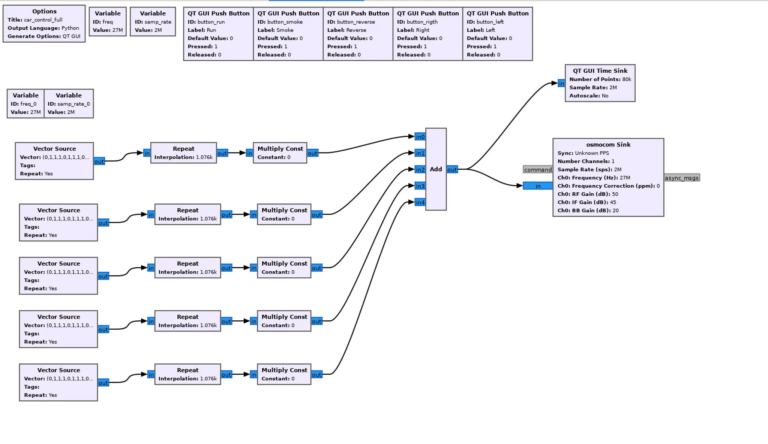
In our article Hacking and synthesizing signal from a Toy Car Controller we performed a complete analysis on a signal that ends up being an OOK modulation generally used in vehicle controls, the signal was synthesized through GNU Radio and a hackRF this time we will talk about how you can build your own application for the hackRF and control your objectives without having to clone signals and replicate them but synthesize them from the hackrf as an application.
This application will be created for controlling the car of the article synthesizing signal from a Toy Car Controller .
Writing an application for hackRF was a real challenge, as the documentation is still limited, fortunately there are some examples that, although some methods have changed their name, still work
To be able to create the application you must first create the development environment that you can find here
Once you have the application environment ready to build you must do the following in the project structure create a file in firmware\application\apps\ in my case I will call it ui_newapp.h
ui_newapp.hpp
// ui_newapp.hpp

#include "ui.hpp"                 // Contains the main UI system interface.
#include "ui_widget.hpp"          // Includes UI widgets, such as buttons and progress bars.
#include "ui_navigation.hpp"      // Includes handling of navigation between views.
#include "string_format.hpp"      // Includes utilities for formatting text strings.
#include "transmitter_model.hpp"  // Includes the streaming model to manage data streaming functionality.

#define PROGRESS_MAX 100          // Set the maximum value for progress (used in the progress bar).

namespace ui {
    // Define a `CarAppToyView` class that inherits from `View`, represents the car toy app view in the UI.
    class CarAppToyView : public View {
    public:
        // Constructor that receives a navigation object to configure the view in the UI.
        CarAppToyView(NavigationView &nav);

        // Function that sets the focus on the view.
        void focus() override;

        // Returns the application title ("Car Toy") to display in the UI.
        std::string title() const override { return "Car Toy"; }

    private:
        // Start data transmission with a specific message.
        void start_tx(const std::string& message);

        // Stop data transmission.
        void stop_tx();

        // Update the stream progress in the progress bar.
        void on_tx_progress(const uint32_t progress, const bool done);

        // Register a message handler for streaming progress updates.
        MessageHandlerRegistration message_handler_tx_progress{
            Message::ID::TXProgress,           // Transmission progress message ID.
            [this](const Message* const p) {   // Callback to handle the message.
                const auto message = *reinterpret_cast<const TXProgressMessage*>(p);
                this->on_tx_progress(message.progress, message.done);
            }
        };

        uint32_t progress = 0;  // Variable that stores the current progress of the stream.

        // Stream buttons with their positions and labels:
        Button button_run{{70, 50, 100, 24}, "RUN"};          // Button to execute the "RUN" action.
        Button button_smoke{{70, 80, 100, 24}, "SMOKE"};      // Button to execute the "SMOKE" action.
        Button button_reverse{{70, 110, 100, 24}, "REVERSE"}; // Button to execute the "REVERSE" action.
        Button button_right{{70, 140, 100, 24}, "RIGHT"};     // Button to execute the "RIGHT" action.
        Button button_left{{70, 170, 100, 24}, "LEFT"};       // Button to execute the "LEFT" action.

        // Progress bar to show the status of the stream.
        ProgressBar progressBar_progress{{2*8, 35*8, 208, 16}};
    };
}
This code will have the basic functions of the car plus the declaration of the functions to be able to access the radio through the transmitter_model.cpp classes
Then you will need to create the following file ui_newapp.cpp in the same path firmware\application\apps\
ui_newapp.cpp
// ui_newapp.cpp

#include "baseband_api.hpp" // Includes the baseband API to handle streaming settings.
#include "encoders.hpp" // Includes data encoding functions for streaming.
#include "portapack.hpp" // Includes PortaPack device-specific settings and functions.
#include "ui_newapp.hpp" // Includes the declaration of the `CarAppToyView` class and its members.

#define CAR_OOK_SAMPLERATE                                                     \
  2000000U // Defines the sampling rate (2 MHz) for OOK streaming.
#define TRANSMISSION_FREQUENCY                                                 \
  27000000U // Defines the transmission frequency (27 MHz).
#define SYMBOL_RATE                                                            \
  1076 // Defines the symbol repetition rate in Hz (1.076 kHz).

using namespace portapack; // Allows the use of PortaPack resources and
                           // functions without specifying the full namespace.

namespace ui {

// `start_tx` method: Setup and start OOK data transmission with a specific
// message.
void CarAppToyView::start_tx(const std::string &message) {
  size_t bitstream_length = encoders::make_bitstream(const_cast<std::string &>(
      message)); // Converts the message to a bitstream.

  transmitter_model.set_target_frequency(
      TRANSMISSION_FREQUENCY); // Sets the transmission frequency.
  transmitter_model.set_sampling_rate(
      CAR_OOK_SAMPLERATE); // Sets the sampling rate for OOK.
  transmitter_model.set_baseband_bandwidth(
      1750000);               // Sets the baseband bandwidth.
  transmitter_model.enable(); // Enables the transmitter.

  // Set OOK data and transmission characteristics.
  baseband::set_ook_data(
      bitstream_length,                 // Length of the bitstream to transmit.
      CAR_OOK_SAMPLERATE / SYMBOL_RATE, // Calculate the symbol period based on
                                        // the repetition rate.
      4,  // Set the number of repetitions for each symbol.
      100 // Set the pause between symbols.
  );
}

// `stop_tx` method: Stops the transmission and resets the progress bar.
void CarAppToyView::stop_tx() {
  transmitter_model.disable();       // Disables the transmitter.
  progressBar_progress.set_value(0); // Resets the progress bar to 0.
}

// `CarAppToyView` constructor: Initializes the view and sets up UI elements
// such as buttons and progress bar.
CarAppToyView::CarAppToyView(NavigationView &nav) {
  baseband::run_image(
      portapack::spi_flash::image_tag_ook); // Loads the OOK image into the
                                            // baseband buffer.

  // Adds the buttons and progress bar to the view.
  add_children({&button_run, &button_smoke, &button_reverse, &button_right,
                &button_left, &progressBar_progress});

  // Set up the buttons with their respective transmission actions (payloads):
  button_run.on_select = [this](Button &) {
    std::string message =
        "011101110111011101010101010101010101011101110111010101010";
    start_tx(message); // Start the transmission with the message corresponding
                       // to the "RUN" button.
  };

  button_smoke.on_select = [this](Button &) {
    std::string message = "0111011101110111010101010101010101010101010101010101"
                          "010101010101011101110111010101010";
    start_tx(message); // Start the transmission with the message corresponding
                       // to the "SMOKE" button.
  };

  button_reverse.on_select = [this](Button &) {
    std::string message =
        "0111011101110111010101010101010101010101010101010101010101010101010101"
        "010101010101010101010101010101010101011101110111010101010";
    start_tx(message); // Start the transmission with the message corresponding
                       // to the "REVERSE" button.
  };

  button_right.on_select = [this](Button &) {
    std::string message = "01 ... button_left. on_select = [this](Button &) {
        std::string message = "01 ... }

        // `on_tx_progress` method: Updates the progress bar based on the
        // progress of the stream.
        void
        CarAppToyView::on_tx_progress(const uint32_t progress,
                                      const bool done) {
      progressBar_progress.set_value(
          progress); // Updates the value of the progress bar.
      if (done) {
        stop_tx(); // Stops the stream when progress has reached the maximum.
      }
    }

    // `focus` method: Sets the `RUN` button as the initial focus when the view
    // is displayed.
    void CarAppToyView::focus() {
      button_run
          .focus(); // Sets the focus to the "RUN" button when the view loads.
    }
  }
To activate your new application, you need to add an entry to the main menu. This menu is located at firmware\application\ui_navigation.cpp. Review the current entries and add a new one in a section that you think is appropriate for your new application.
firmware\aplication\ui_navigation.cpp
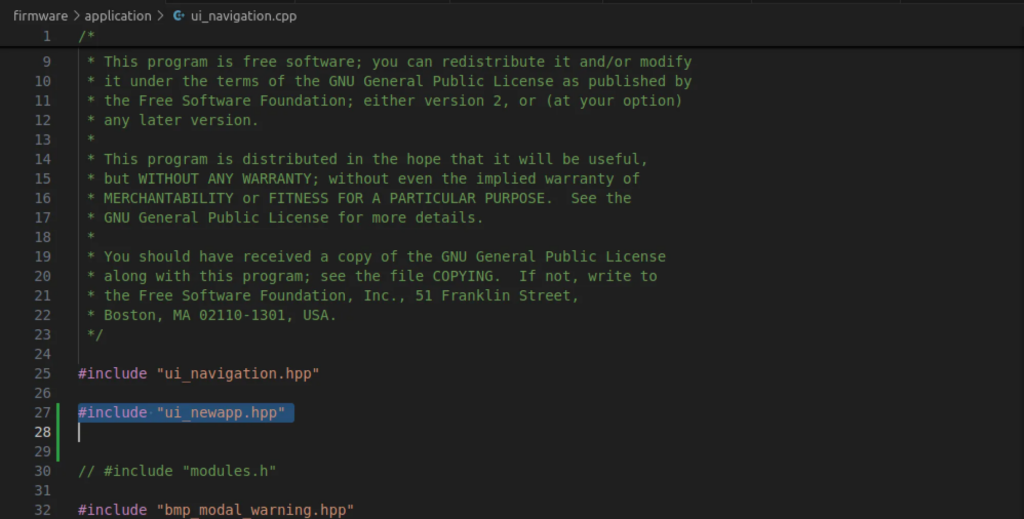
Within the same file you must add the app so that it appears in the menu
// Add this to the top to link your new app's header file
#include "ui_newapp.hpp"

...

// Adding NewApp to the Transmitters Menu
const NavigationView::AppList NavigationView::appList = {
    add_items({

        ...

		    {"cartoy", "CarToy", TX, Color::green(), &bitmap_icon_remote, new ViewFactory<CarAppToyView>()},
    });
}
Early Test
Remember to add yours apps/ui_newapp.cppafirmware\\application\\CMakeLists.txt
# C++ sources that can be compiled in ARM or THUMB mode depending on the global
# setting.
set(CPPSRC
    main.cpp

    ...

    apps/ui_newapp.cpp
)
At this point you should be able to compile and test the app on your device. For your reference, here is the link to the Compile-firmware wiki. The new app should appear in the menu you selected in ui_navigation.cpp.
If you want to clean the project in build you can run make clean

Once you compile the project you can upload the new firmware to the portapack.
hackrf_spiflash -w /path-firmware-mayhem/build/firmware/portapack-h1_h2-mayhem.bin

Now you can see the result, your application in the main menu of the HackRF PP.
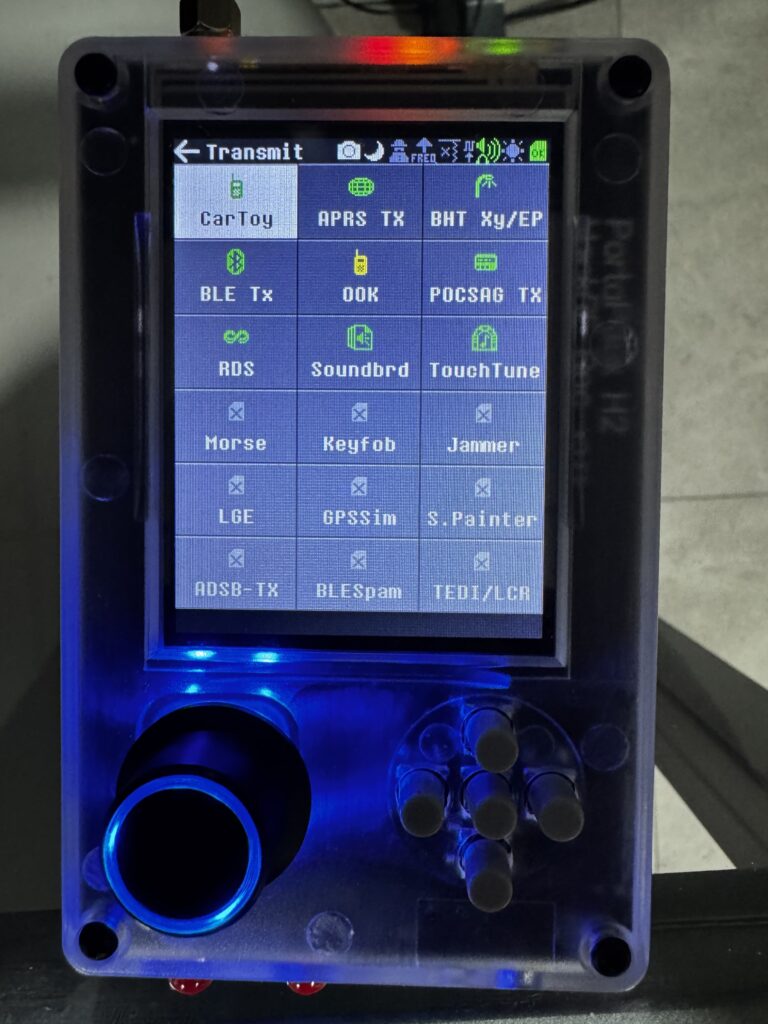
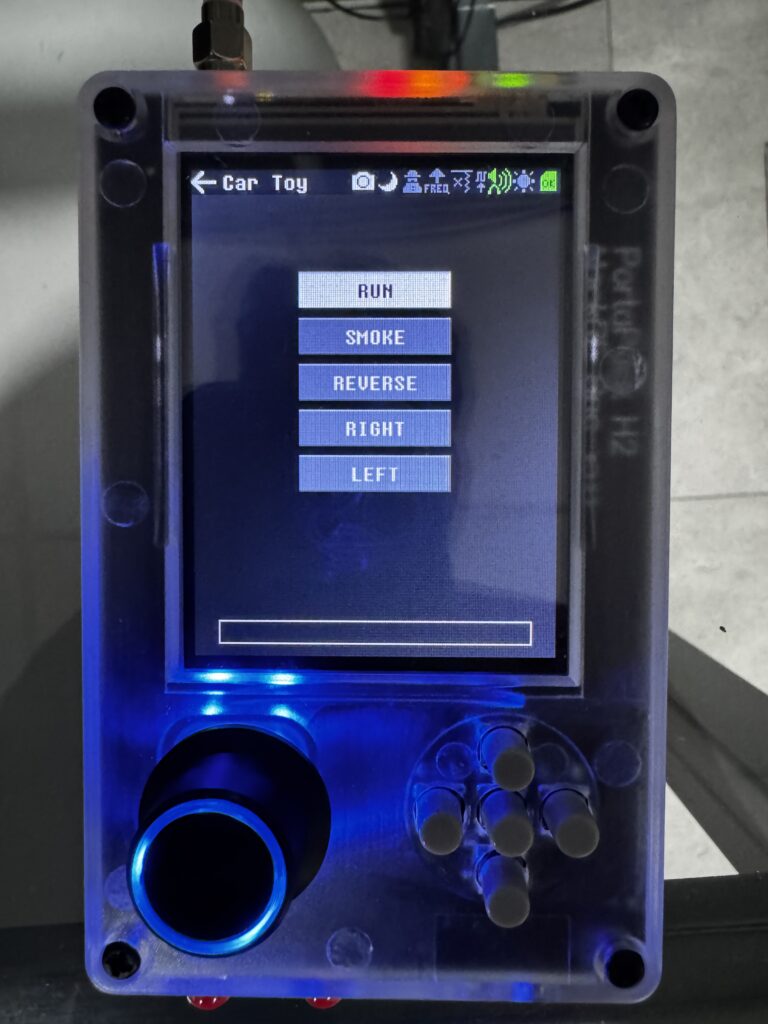
Let’s see our new application in action.
He has finally been able to build his own application for the Portapack, take it anywhere and send synthesized signals via OOK modulation.




Leave a Comment